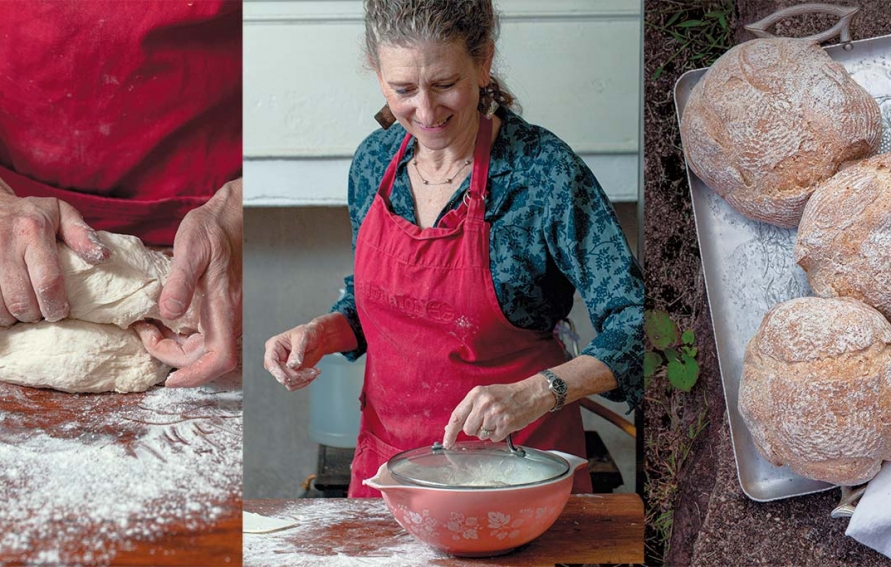
With this recipe as your guide, you can make sourdough bread, start to finish, in one day. The bread has a mild sourness and works well as a sandwich bread. Feel free to change the timing slightly. Due to variations in flour density, it is most accurate to use a digital scale for measuring raw ingredients. Using a scale also helps reduce the number of spoons and cups to be cleaned, and working with metric measures makes it easy to calculate changes in batch size.
Preparation
8am: Divide and feed your starter
I generally keep my starter in the refrigerator year round. My starter is made up of multiple beer yeasts and lactic bacteria, and will not burn itself out if left unattended for up to 4 weeks. For weekly baking, I maintain 400 grams of starter in a quart-size plastic container. If I don't bake for 2 weeks, I pour out 200 grams of starter and feed the remaining starter with 100 grams of water plus 100 grams of flour. This fresh fuel keeps the starter alive.
Measure out 200 grams of your starter into a mixing bowl. If you plan to use a standing mixer, use the mixer's bowl. Measure 100 grams of 90°F water into your bowl, and whisk it in until the starter has dissolved. Stir in 100 grams of unbleached all-purpose wheat flour until the mixture is smooth. Cover the bowl loosely (with a pot lid or a slightly dampened flat-weave kitchen towel) and leave it at room temperature (between 70° and 85°F) for 6 hours. This is your pre-ferment. It will get very puffy!
Meanwhile, add 100 grams of cold water to your remaining starter, then mix in 100 grams of flour. Cover and refrigerate this starter for next time.
2pm: Mix your dough
Add 275 grams of water and 530 grams of flour to your pre-ferment mixture. Mix at low speed, or hand mix until the flour is moistened. Cover and let the dough rest for 30 minutes. This step of resting is called autolyzing. It allows the flour to absorb water and the natural enzymes to activate.
2:30pm: Add salt and tighten up your dough
Sprinkle 15 grams of salt onto your dough; mix it in on low speed or by hand. You will notice that your dough is beginning to come together, and threads of gluten are beginning to form. This will likely take about I minute.
- In an electric mixer, you can allow the dough to mix until it comes together and begins to develop a sheen and a smooth surface.
- When hand mixing, scrape along the edges of the bowl, and then fold the dough over into the middle of the bowl until it becomes difficult to move the dough using the spoon. The threads of gluten should be visible, and the surface of the dough will begin to look smooth.
Once the salt is fully incorporated and the dough is coming together, use a curved dough scraper to scoop your dough onto a lightly floured surface. I like to use a large cutting board, stabilized with a damp kitchen towel underneath it.
2:35pm: Knead
(Your dough may seem wet; do not add more flour. Dip your hands in flour so that they are very lightly coated. If the dough begins to stick to your hands, dip your hands in the flour again. If the dough is sticking to your board, dip your dough scraper into your flour to lightly coat it, scrape the dough off your board and lightly flour the board again.)
Fold your dough in half. Rotate it 90 degrees, and fold it in half again. The number of times you repeat this step will depend upon how much you worked your dough in the mixing bowl. You want to stretch your dough until the surface is as Arm as the tip of your nose. This benchmark lets you know that your gluten flbers are fully stretched and your kneading is done.
Gently round your dough into a ball, place it in a bowl that will allow your dough to puff up to twice its height, and cover I like to use a large pot lid as the cover; but a damp linen or cotton towel will do the trick. Avoid using terry cloth, as it is nearly impossible to wash dough out of it!
Leave your dough at room temperature (70° to 85°F) for about 2 hours.
4:30pm: Form your loaf
Use a standard loaf pan. It can be glass, ceramic or metal. Lightly grease the pan with oil or butter, then dust it with flour.
Scrape your dough gently out of the bowl onto a lightly floured surface. Do not punch it down. Without squeezing the dough, roll it away from you as if you are rolling up a burrito. Turn it 90 degrees and roll it again. Drag it gently toward you to smooth out the seam that is underneath, and your dough should elongate into a rather football-ish shape. Place your dough in the pan, and cover it lightly with a damp towel.
Let it rest in the pan for about 2 hours.
6:30pm: Bake!
Preheat your oven to its highest setting, probably 550°F. Mark your loaf with 3 diagonal, ¼-inch-deep cuts, using a paring knife if you don't have a lame. Put your loaf in the center of the oven, and put 3 ice cubes on the floor of the oven to create a burst of steam.
Bake for 15 minutes, reduce your oven temperature to 400°F, and bake your bread for an additional 30 minutes or so. Your bread should be nicely browned. You can test for doneness by gently inserting a quick-read thermometer and looking for 205°F. Or, you can remove your bread from the pan (wear oven mitts!) and tap the bottom, listening for a hollow sound.
If you can be patient, allow your bread to cool for at least an hour before cutting it. The last stage of baking is cooling, and this step will improve the texture and moisture of your bread. I usually let the bread cool overnight so I can enjoy it for breakfast or lunch the next day.
Thanks to the moisture of this recipe, I find that the bread stays fresh at room temperature for 3 days or so (cut-side down on the cutting board). If you prefer, slice it and freeze it in an airtight container for longer keeping.